Braids are always fun to experiment with – after all, there are so many amazing styles out there that you can create! If you need some inspiration, here are seven statement-making braid styles that are guaranteed to wow everyone!
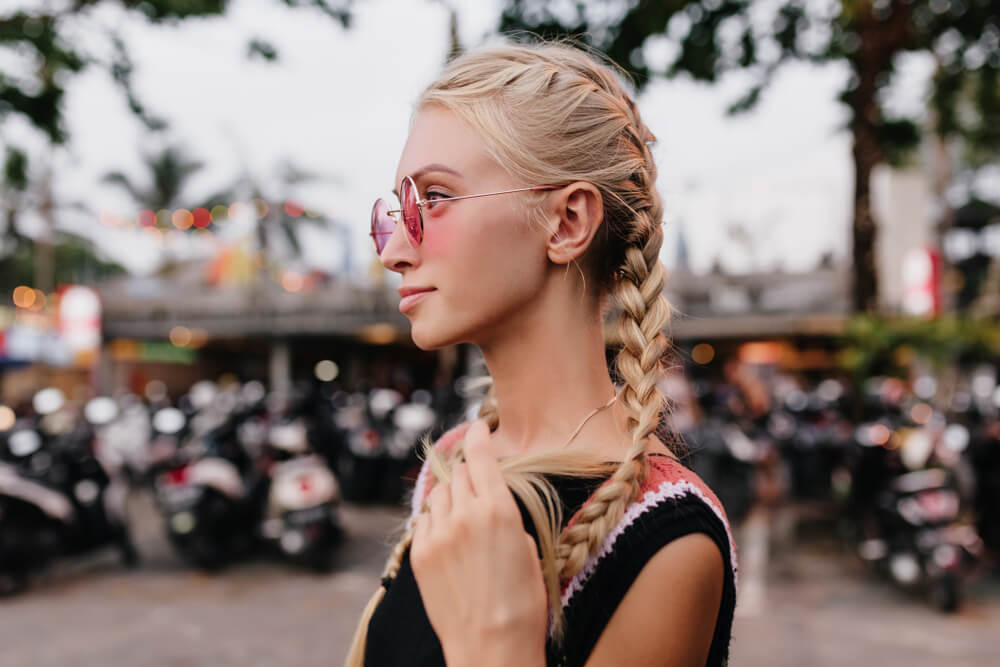
Double Dutch Braids
https://www.instagram.com/p/Bz6bOumFmOg/
Classic yet attention-grabbing, double Dutch braids are actually an extremely practical braid style to go for. They keep your hair out of your face and firmly held back, enabling you to wear them to everywhere from work to the gym.
Don’t worry, they’re not as complicated as they look. Although, if you have long hair, you may find your arms tiring halfway through the first few times you create this braid!
Still, these gorgeous braids are definitely worth trying, so here’s what you need to do:
- Section your hair into two. You can either do this down the middle, or keep your parting off-center. Use a comb if you want a defined parting line
- Secure one side of your hair up with a clip or elastic band, so that you can concentrate on the other side first
- Take a small portion of hair from the loose side and separate this into three. Make sure that each of the three sections are as similar in size as possible, otherwise your braid will look uneven
- Begin braiding by crossing the right strand under the middle strand, and then cross the left strand under the middle strand
- As you go along, add in more loose hair, continuing on until you reach the end. Tie your braid off with a clear elastic band
- Repeat those steps with the second half of your hair
- Finish off by pinning away any flyaway strands, and then giving your hair a spritz of hairspray
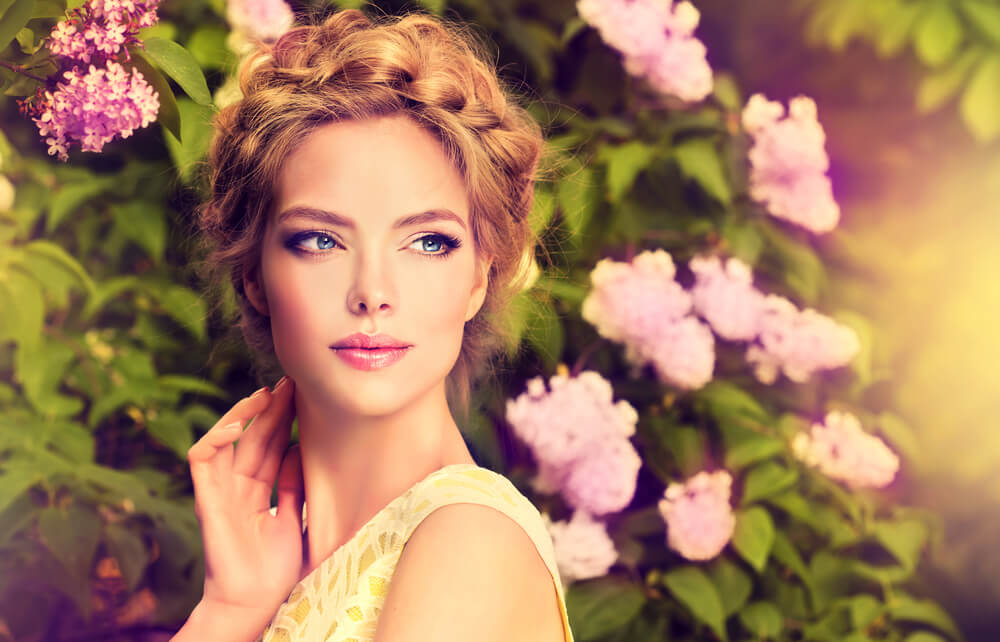
A Parting Braid
https://www.instagram.com/p/BJ-5ITqgxT2/
The beautifully delicate parting braid has been made especially popular in recent months, thanks to the fact that this braid has been seen on everyone from Cara Delevingne to Jessica Alba.
It may look like a difficult braid style to put together, but it is actually quite easy, especially for those of you who already know how to French braid.
Here’s what you need to do:
- Wash your hair and then dry it until it is about 50% dry
- Apply a volumizing mousse to add in some extra volume around your roots
- Finish drying your hair with a blow dryer
- You can now create your deep side parting, running this all the way from your front hair line to the nape of your neck. You could also apply a bit of hair serum at this stage to give your hair some extra shine
- Take the section of hair that is opposite your parting and split that into three
- Start braiding your hair into a regular braid, but, after a few rows, switch to more of a French braid style, where you add in other sections of hair as you go along
- Once you reach the nape of your neck, secure your braid with a clear elastic band
- Spritz on some hairspray to give your braid staying power
Micro Braids
https://www.instagram.com/p/BlNDYkkBICu/?utm_source=ig_embed
If you are looking for a braid style that is long-lasting and does not require much maintenance, then micro braids may be just the style for you.
What exactly are micro braids?
They are braids that are extremely tiny and delicate, and are usually woven quite tightly to the scalp. Once created, micro braids can last for up to three months, and you can put together so many different hairstyles with them.
How do you create micro braids?
For this braid style, you would be best off visiting a professional hairstylist, especially if you want the finished result to look seamless.
However, you can still create this look yourself at home if you would like – here’s what you need to do:
- Divide your hair into four sections
- Take a very small piece of hair from one of the sections and then start braiding it
- Continue doing this with the rest of your hair, until everything has been braided
Those three steps make this style seem quite simple, and, to a certain extent, it really is.
However, since you are creating so many tiny braids, it can take quite a long time to finish your whole head. How long it takes, exactly, depends on the length and thickness of your hair, but you can expect this style to take anywhere between four hours and twelve hours. This is another reason why it can be more beneficial to have this done professionally – just think of how much your arms are going to ache after hours of braiding!
If you decide to go for this style, keep in mind that it will require some upkeep. A high quality conditioner is a must, and you need to make sure that you never allow any hair product residue to build up in your hair.
A Half Up Half Down Fishtail Braid
https://www.instagram.com/p/ByBhKZqh9aT/
Fishtail braids have been pretty trendy for a while now, and there are several variations out there to choose from. If you’re looking for a sweet and delicate way to wear the fishtail braid, give this half up half down style a try.
How?
Here’s what you need to do:
- Part your hair and then section off some hair on the left side, starting about three inches from the hairline. Clip away the hair that is in front of this
- Take a small piece of hair from near your parting and divide that into three, before starting off with a regular braid
- Combine the right and middle strands together, so that you’re left with two sections. Take a piece from the right, crossing it over to the left, and then take a new section of hair and cross this over to the left
- You then need to take a small section of hair from the left, crossing it over to the right, and then take a new section and cross this over to the right too
- Repeat those steps until you have reached the back of your head. Fasten it with a bobby pin to prevent it from unravelling
- Release the section of hair you had clipped away from the start and braid this in the same way you did earlier
- Take the remaining loose section of hair and create a third fishtail braid, until it is ear-length. Fasten with a bobby pin
- Create a gap halfway down the right braid, before pulling the left braid that is at the back through this gap
- Use bobby pins to fasten both braids to your head, tugging on them slightly to give them some extra size and volume
- Take the left braid that is at the front and then lay this underneath the other two braids, pinning into place
- Finish off with a spritz of hairspray
A Chunky Braided Halo
https://www.instagram.com/p/BzcoW5YBnHr/
Have you seen the halo braid before?
Also known as a crown braid, it is often created in a way that holds the braid tight against the head, making it a great style for more formal occasions.
However, you could also go down a different route, creating a halo that is chunkier and more voluminous instead. While this does still work for special occasions, it is also a style that you could wear casually during the day.
Here’s what you need to do:
- Apply a hair serum onto dry hair to minimize frizz and add shine
- Divide your hair into two, all the way from the front to the back
- Take a small section of hair from one of the halves and, starting at the nape of your neck, begin a Dutch braid
- Continue doing this around your head, following the shape of your hairline, until you are back where you started
- Finish the Dutch braid off with a regular braid, and then secure with an elastic band
- You now need to wrap the ends of the braid around your head. Use bobby pins to secure it as you go along, but try to tuck the bobby pins away so that they cannot be seen
- Finish off with some hairspray to give your style some hold and to prevent flyaway strands
Knotless Box Braids
https://www.instagram.com/p/BwN5lcpHak-/?utm_source=ig_embed
Box braids have always been popular, but the downside to them is the pain involved when it comes to creating them. All of that pulling and tugging on your strands quickly results in breakages, not to mention a painful first night of sleeping on your braids.
Thankfully, there is now an alternative…
Enter knotless box braids!
Unlike regular box braids, in which all of the hair is added to the braid at the beginning, knotless box braids use a feed-in technique, slowly adding more hair in as the braid is being created. Hair extensions are usually combined with a three-strand braid, giving you more length and volume, while still looking absolutely effortless.
Wondering if knotless box braids take less time than regular box braids?
Unfortunately, no. They can actually take a little longer, depending on the length and thickness of your hair. However, just like regular box braids, the knotless version lasts for around six months.
Of course, upkeep is important to prolong this braid style, and this usually involves the following:
- Regularly cleansing the scalp, as well as keeping it moisturized, since box braids leave the scalp more exposed to the environment
- Keeping the ends of the hair moisturized, usually with a hair oil or serum
- Sleeping on a silk pillowcase, or wrapping your hair in a silk scarf, to minimize frizz
Speaking of frizz…
Knotless box braids do tend to be more prone to frizz than regular box braids. This is due to the way in which there is a greater amount of natural hair exposed at the root. If you are a swimmer, meaning that your hair gets wet more frequently than average, you may want to consider regular box braids instead of the knotless version.
A Waterfall Braid
https://www.instagram.com/p/Bw7rfkigpUB/
No braid style is quite as pretty as the waterfall braid. They became popular a few years ago, and have only been getting more and more intricate over the months.
Waterfall braids are something that you can do yourself at home. Once you have the technique mastered, it shouldn’t take you too long to put together this look.
Here’s what you need to do:
- Apply a texturizing spray to your hair, as this will give it some extra grip
- Part your hair and then take a couple of inches of hair from near your parting, dividing this into three
- Start weaving your hair, making your way to the back of your crown. Do this by crossing over the nearest section of hair with the middle section, before crossing the bottom over the new middle section
- Then, take a new section of hair from the top, before crossing this over the middle. Drop this down before crossing the bottom over the piece you dropped
- Start the weaving process again, continuing on until you have reached the back of your head. You can then secure this braid with an elastic band
- Repeat those steps with the other half of your hair
- You should now have two braids, which you can then join together, tying these with an elastic band. Once you have done so, you can then remove the two elastic bands that were around each braid, since the third band will be enough to secure them in place
- Finish off with some hairspray
Braids are a classic hairstyle to go for, and the fact that there are so many different braid styles and variations out there make them even more fun to create. Whether you want long-lasting box braids or elegant waterfall braids, these seven styles are guaranteed to wow everyone that sees them.

Leave A Comment